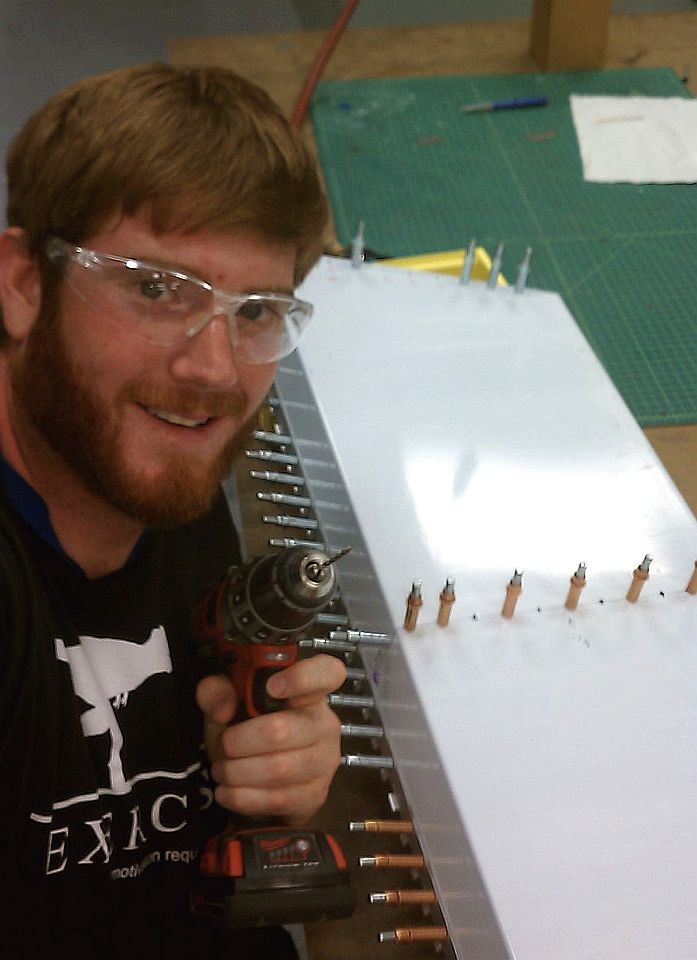
I DRILL!!
Total Hours: 24.6
Hours Fabricating: 18.6
Fab Hours to Date: 182.5
28-Sep-12
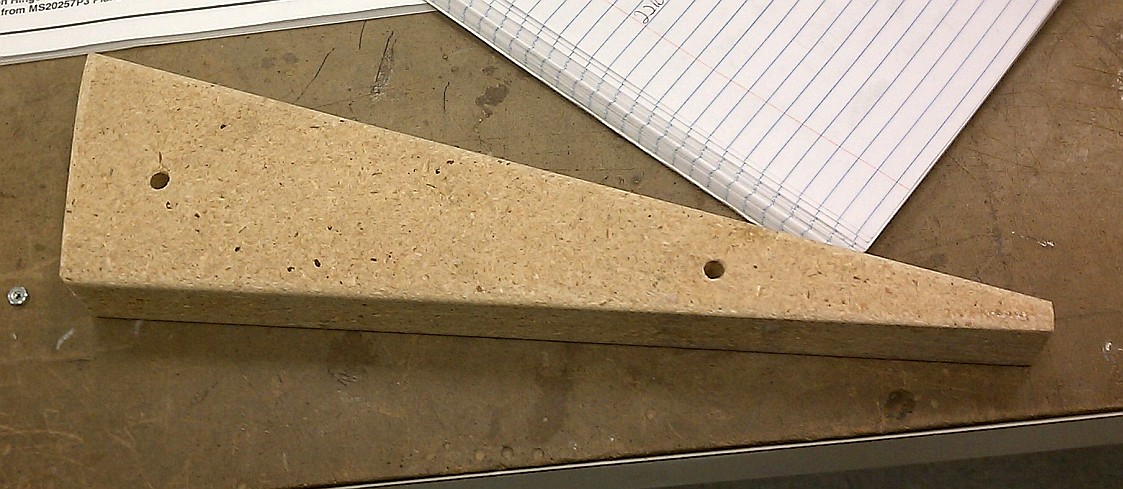
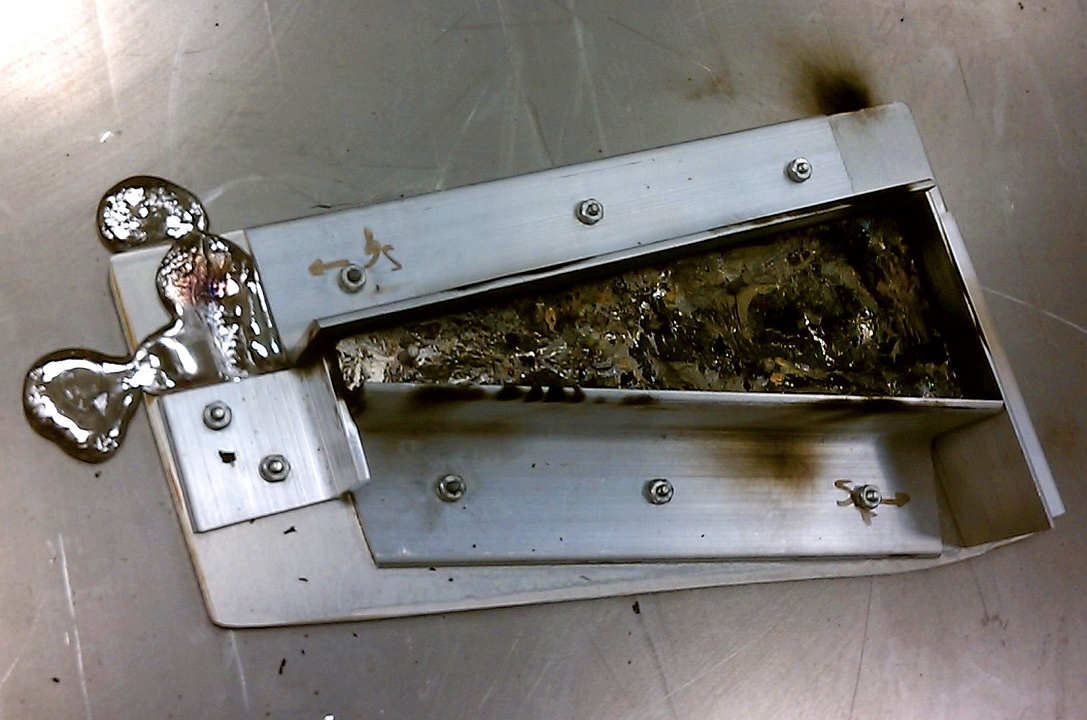
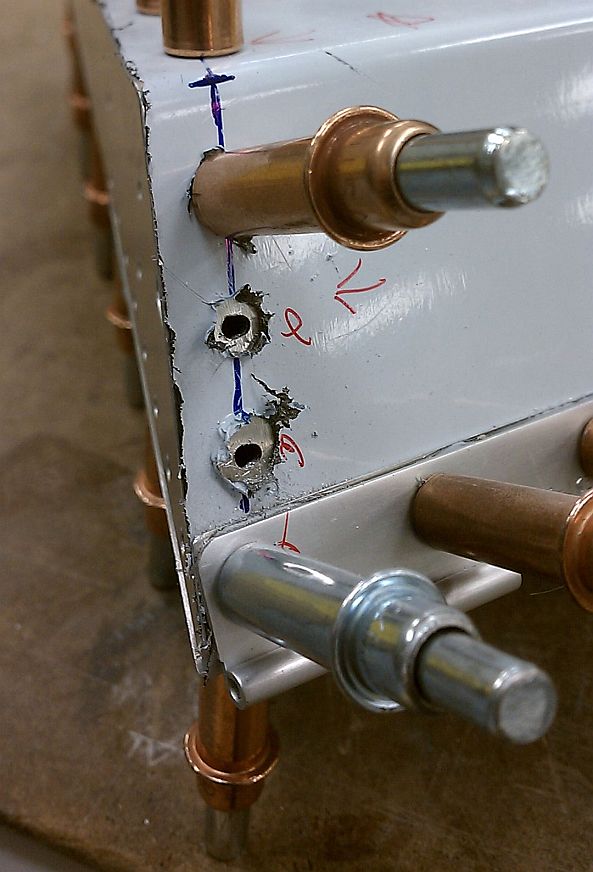
I started cutting pins and reassembling the lead mold for the second casting. I finished assembling the mold and re-casted the second weight. I used the torch to melt and cast the second weight. While that was cooling, I made an aileron former blocks from 1" and .25" composite-chip board.


25-Sep-12
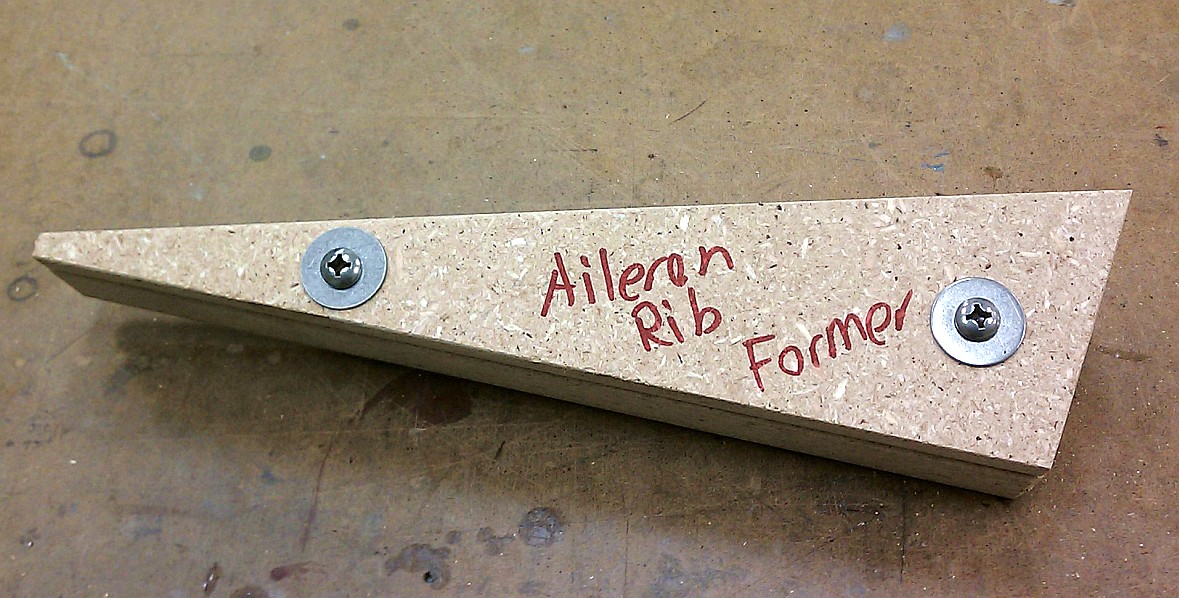
Continued work after an 8 Day Business trip to the east coast. I inspected all of the rivet holes of the Aileron Ribs and filtered out all of the Ribs that had holes in question. I went back with the Calipers and found 3 aileron ribs that I thought should definitely be remade and re-drilled.... With a wider flange. Once the rib inspection was complete, I went to the CAD Station to Draw the Ribs, New Ribs w/ wider flange, and Sketch up former blocks to make the new Ribs.
26-Sep-12
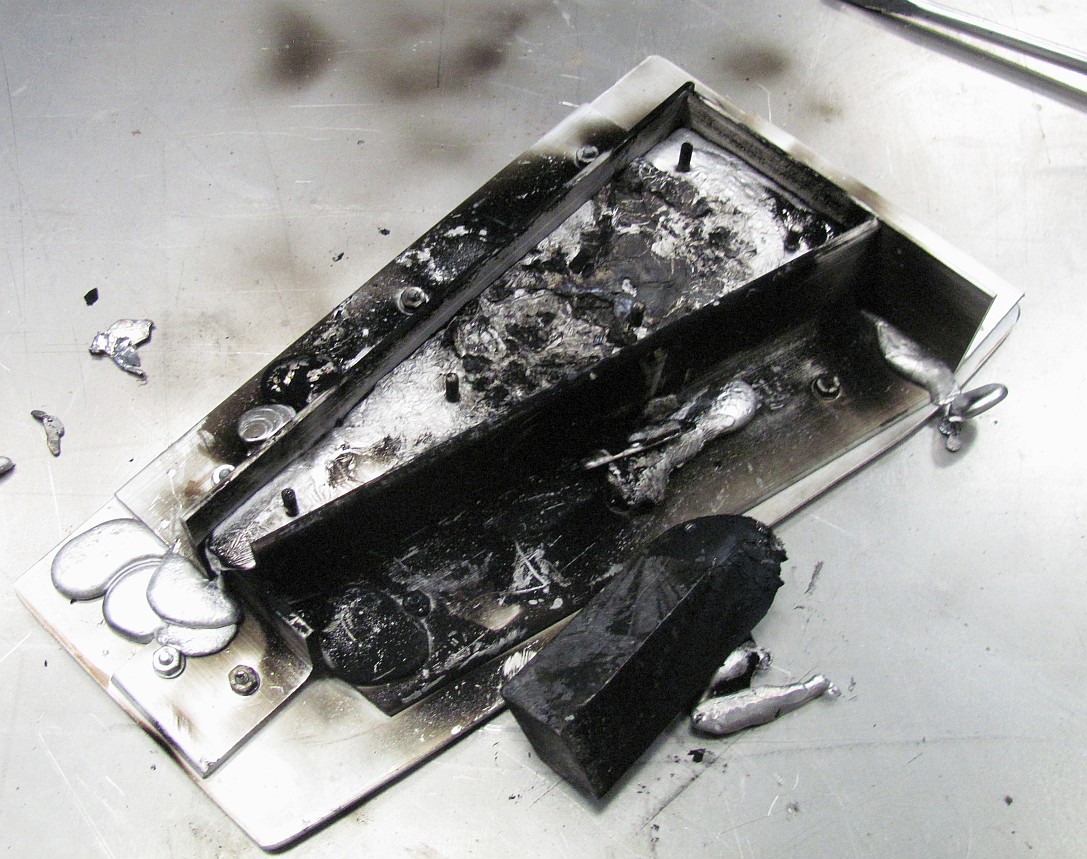
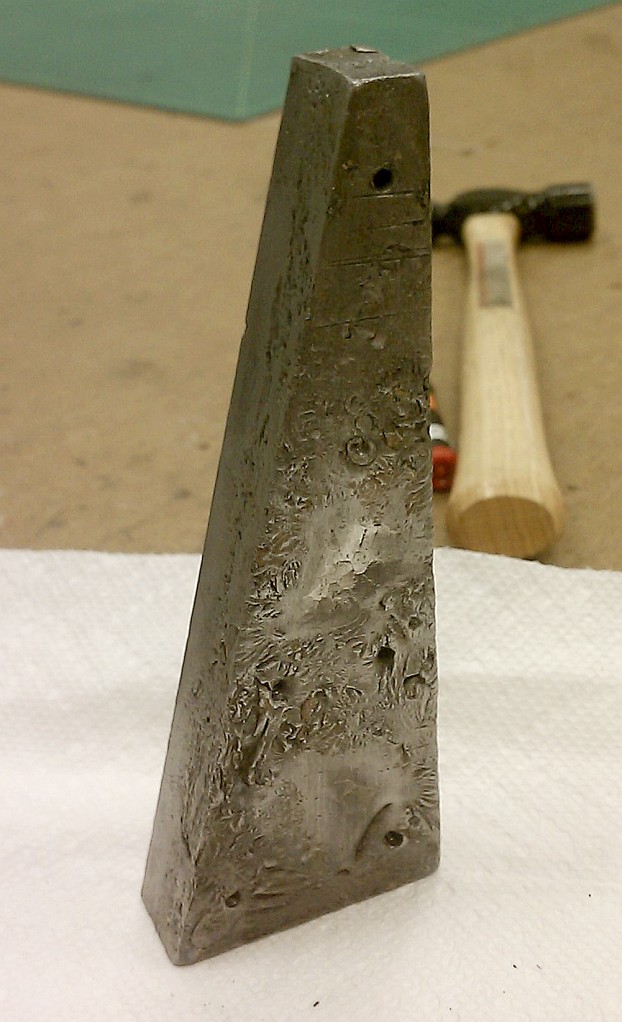
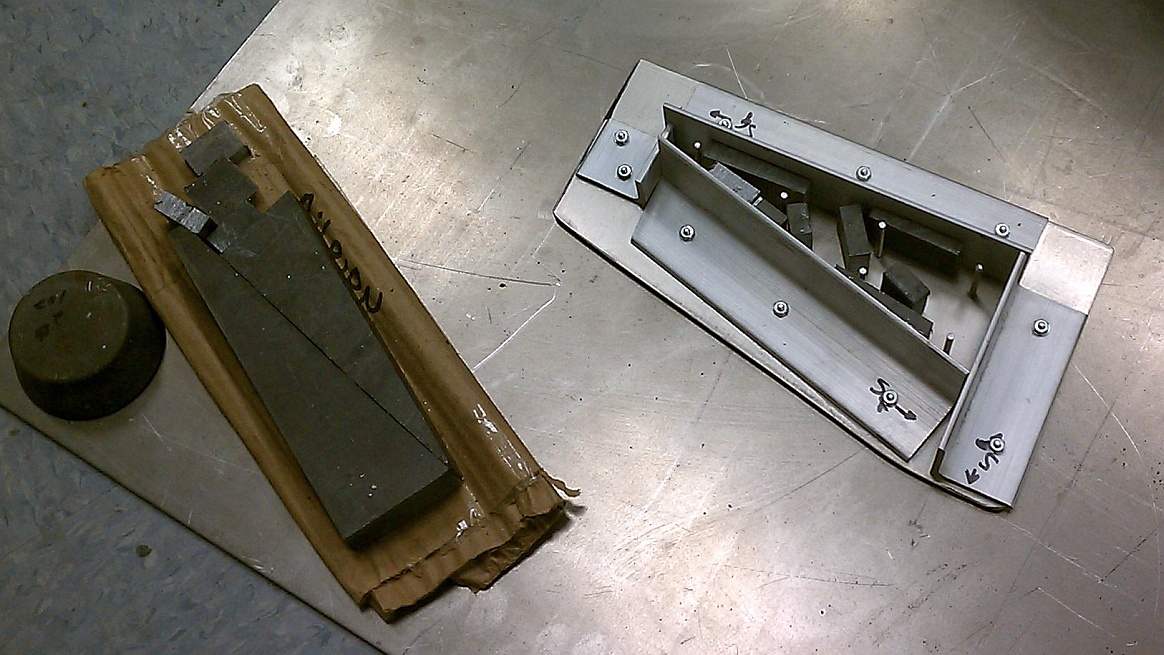
Slow Night :-( I finished disassembled the first lead casting. I removed all but 1 aluminum pin (it became stuck). I cleaned the casting.
12-Sep-12
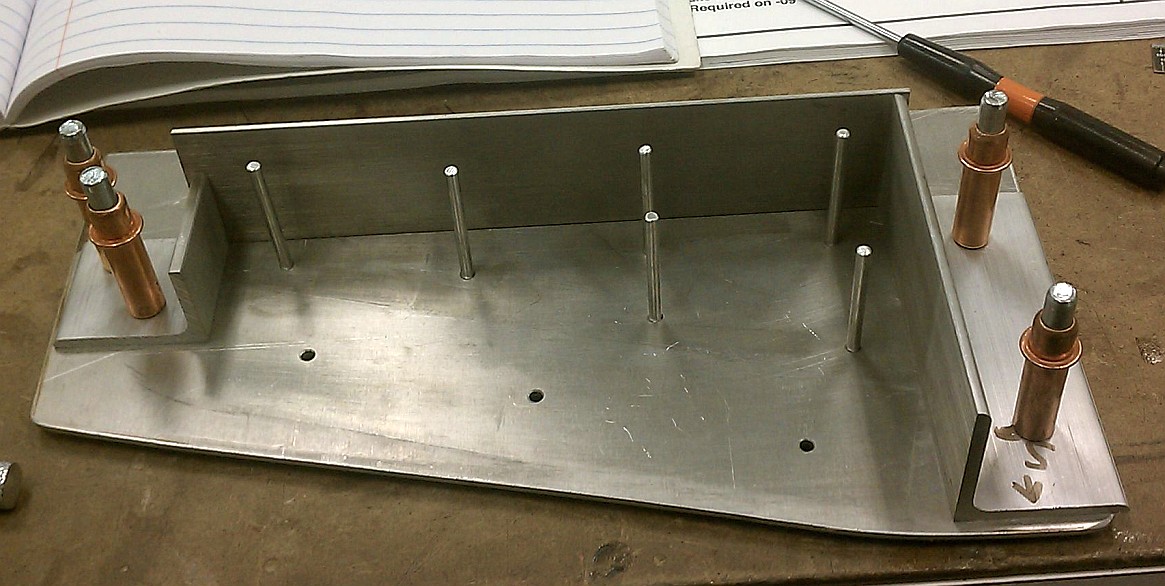
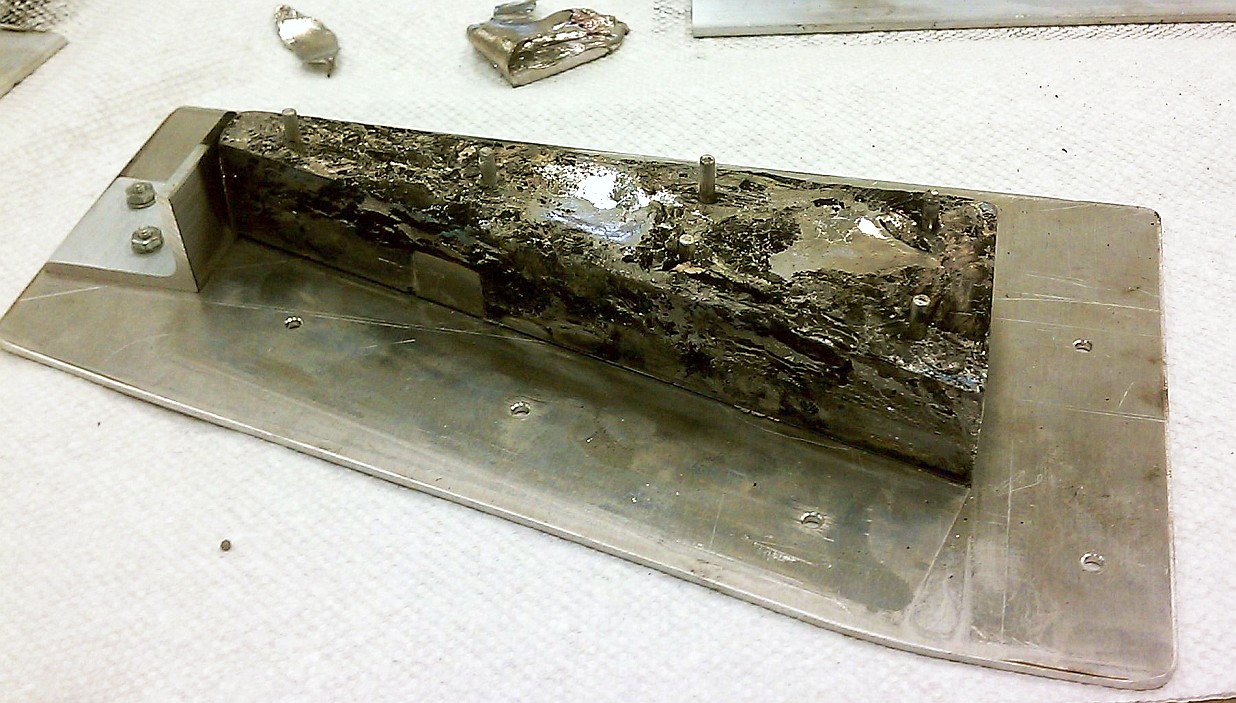
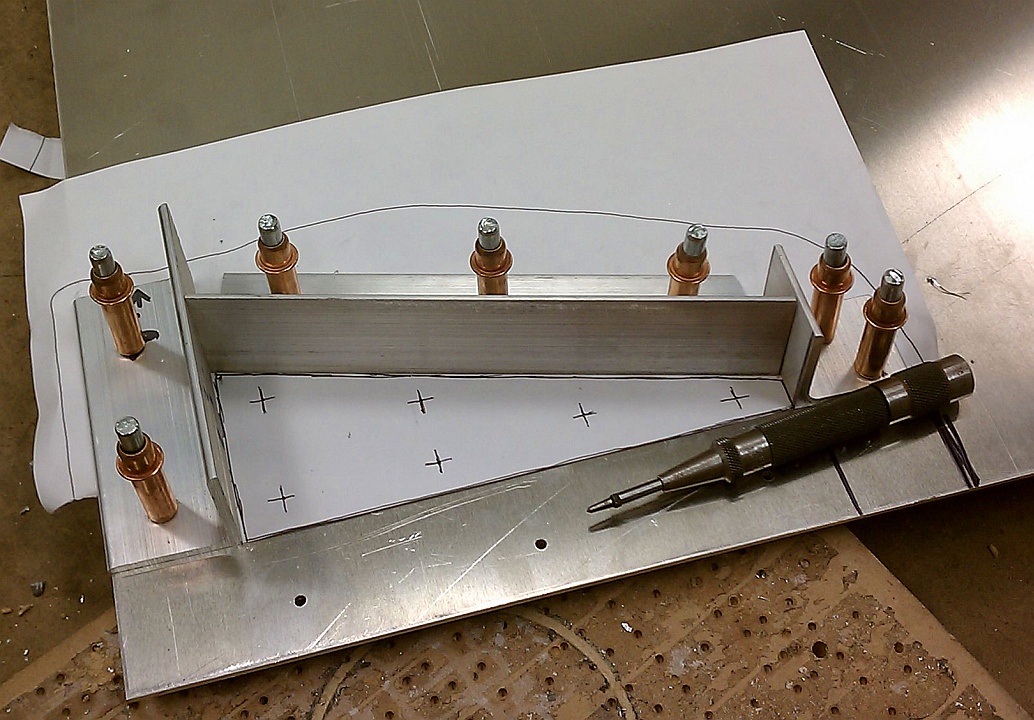
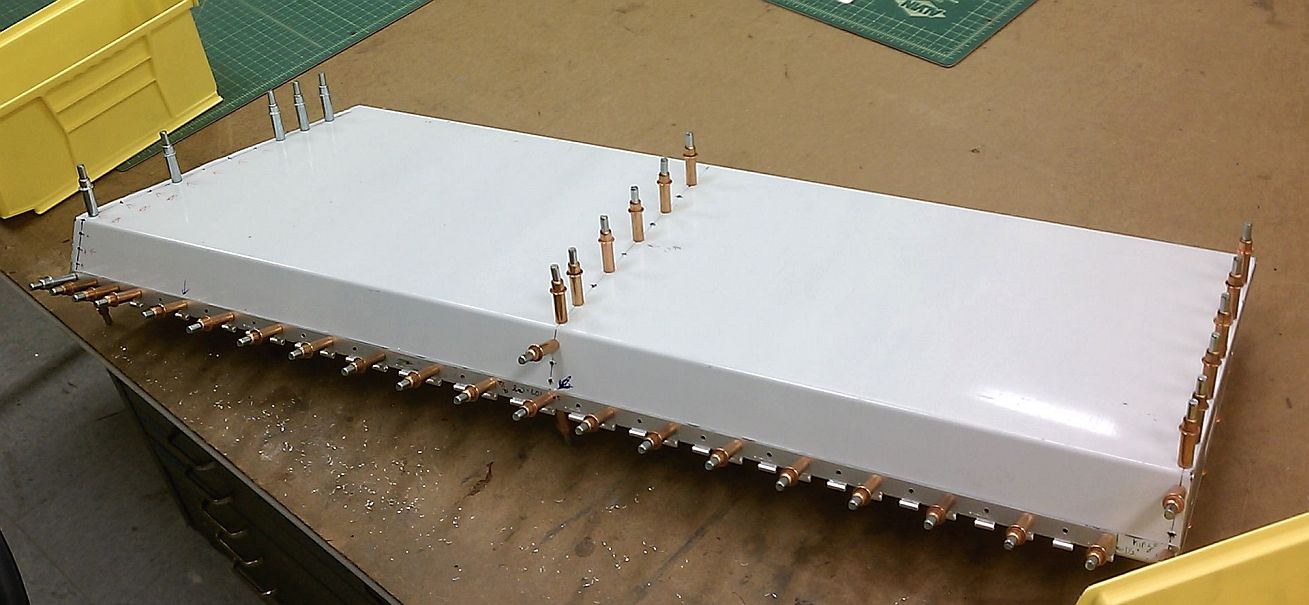
Started work on a mold to pour new Aileron Counterweights. I used aluminum angle and a flat plate. I drilled and clecoed the angle on and drilled holes for Hole Saver posts.

13-Sep-12
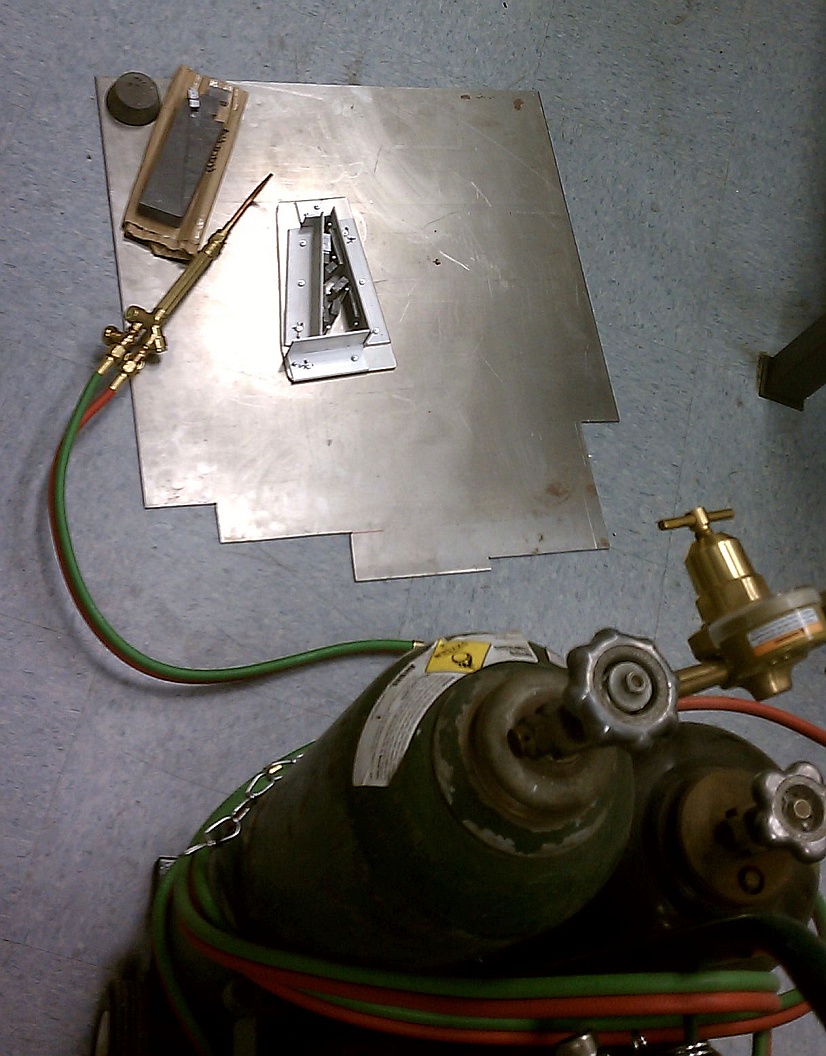
Continued work on the Lead Counterweight Mold. I used the Oxy- acetylene torch to melt the lead down into the mold.

9-Sep-12
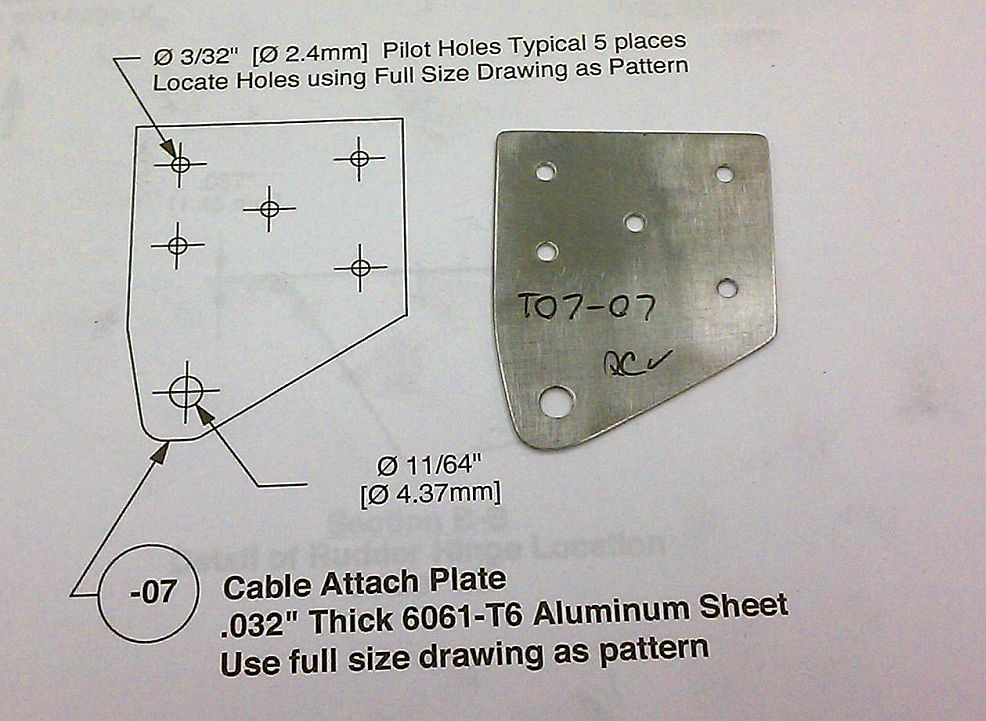
I continued working on the elevator, performing a final debur operation on all rivet holes. Once complete with debur, I fabricated the Cable attach plate (for the Trim Tab) and mounted it to the left elevator drive rib.

This was a late start / slow night, but I was determined to get something done! I decided to fabricate the trim tab. I marked it per the drawing, rough cut it on the bad saw, drilled the critical holes, bent it on the break, and then sanded and polished it up nice n' perdy.
*** I think I my bend radius is too small and might be prone to cracking. Before I rivet the elevator together, I think I might remake this part with a larger bend radius :-/


I began the night by dis-assembling the elevator and inspecting the rib holes. I found that some holes on the drive rib were not quite on centerline. All holes were off to the inside of the flange and it is not yet known how critical this offset will be (I Hope I'm not giving myself away here by posting this! :-P) I deburred all ribs/skins, and began updrilling the holes in the left elevator assembly.

8-Sep-12
I continued work on the elevator assemblies. In an attempt to mitigate the extent of the off-center-line holes, I used a file to bias the updrill to a more desirable location. This seemed to work, in theory as it did not move the hole closer to the flange edge. I will consult the experts before finishing this assembly as to what my options may be.


1-Sep-12
Pleasant Distractions: Airplane flying, especially with a new lovely Co-Pilot is always an acceptable distraction from airplane building!

My Co-Pilot, Kristen A gorgeous day on Catalina Island
Back to SONEX Back to Ashton Aerospace